Viewing entries in
DIY

Comment

projects and studio peaks

We finally got a start on organizing the Knee High Store and the LL&L Studio.  It was great to start to see it unfold.  Just a few weeks and we will be open for business!  I can't believe how quickly it has snuck up on us.  

Here is a little peak at the store / studio with a few furniture pieces that will be used for display.   I LOVE the beautiful floors and tin walls and ceiling.  The tin is original to the building, from the late 1800's.   It  has a great history to it.  

Old Dresser Face Lift:

My desk - and my little helper: 

The little manikins (they will be cuter with clothes on, and maybe arms and heads too)!

Did you notice the chippy yellow door in the pictures above?  I wanted to use that as a head board, but it is seriously super heavy.  I was worried about attaching it to the wall.  And, I would like to use it in pictures too...  so, I purchased another door, not as heavy and I think it turned out great.  

What do you think about they vintage yellow laps? Should I keep them yellow or paint them white?  I don't want to ruin them, because I LOVE  them - but, I am not sure if I love the yellow...  any suggestions?

Comment

Comment

2013 quickly approaching

The past 5 years have represented many changes in my life.  And, as life should have it, I know 2013 will be filled with many more.  Some that we can plan for, and some that we can't.  But, I am really looking forward to 2013. 

Just over a year ago - I started this photography journey.  It has been a excellent way for me to develop a different side of myself.  And with that, I stumbled into this writing that is turned into my own type of therapy.  I love writing.  I love sharing the challenges of parenting and living, and rejoicing in all of the everyday blessings that are so powerful.  It is the little things that make life worth living - they are why we do what we do.  We love and connect with people - our friends, families, strangers.  We share joy and sorrow - we empathize, together.  That is what makes us human.  I want to celebrate more of those connections. 

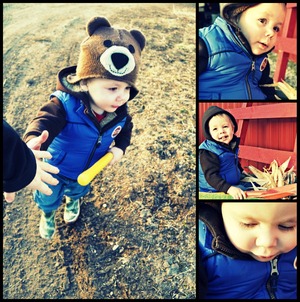
photo credit Chris Bland

This year, in the quickly approaching 2013, my focus is connecting.  I love the connection I have found from the past that has come to bless me this year, and every upcoming year for the rest of my life.  This is developing through my engagement and wedding planning...  but most importantly, life planning.  In my personal life, I get to share wedding planning and many, many more stories of my baby boy that is quickly turning into a little man.  

I love the connections I have made with new families and clients and I look forward to the many more that I will meet and the continued experiences I will get to share with the clients that call me to capture their life.  For Life, Love & Lemons Photography, I will be opening a studio!  It isn't all mine - I am sharing it with a wonderful and ambitious young lady, Abby,  that I happened to connect with through taking her family pictures.  She is opening a baby boutique, Knee High to a Grasshopper - and I will be sharing some space with her.  I am really looking forward to the expansion of my business and the many, many new faces I will meet along the way.  Click on the logo to take you to her FB business page - like and share! ;)

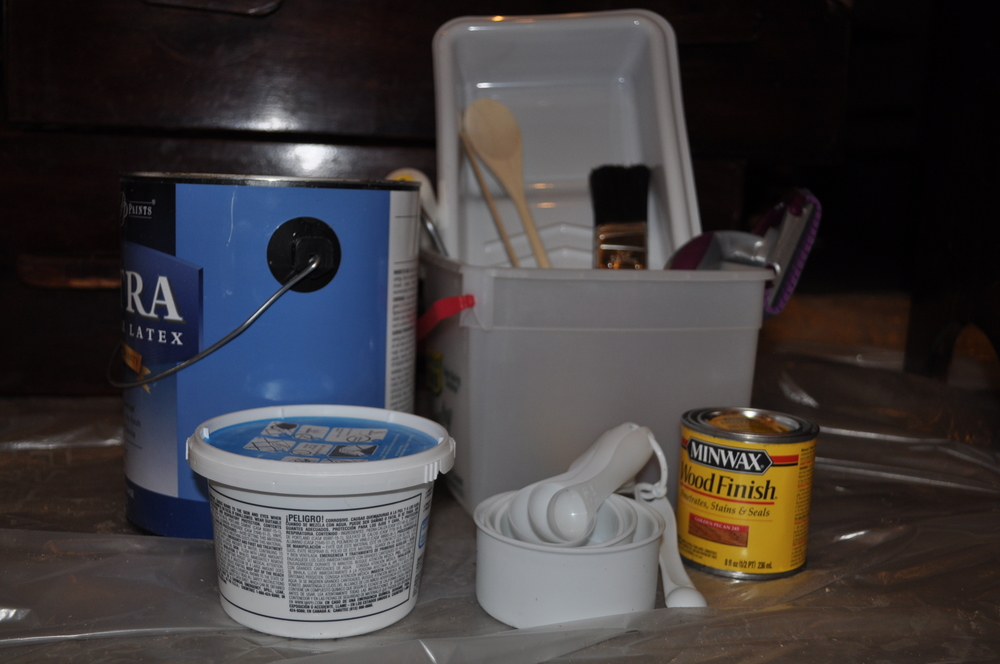
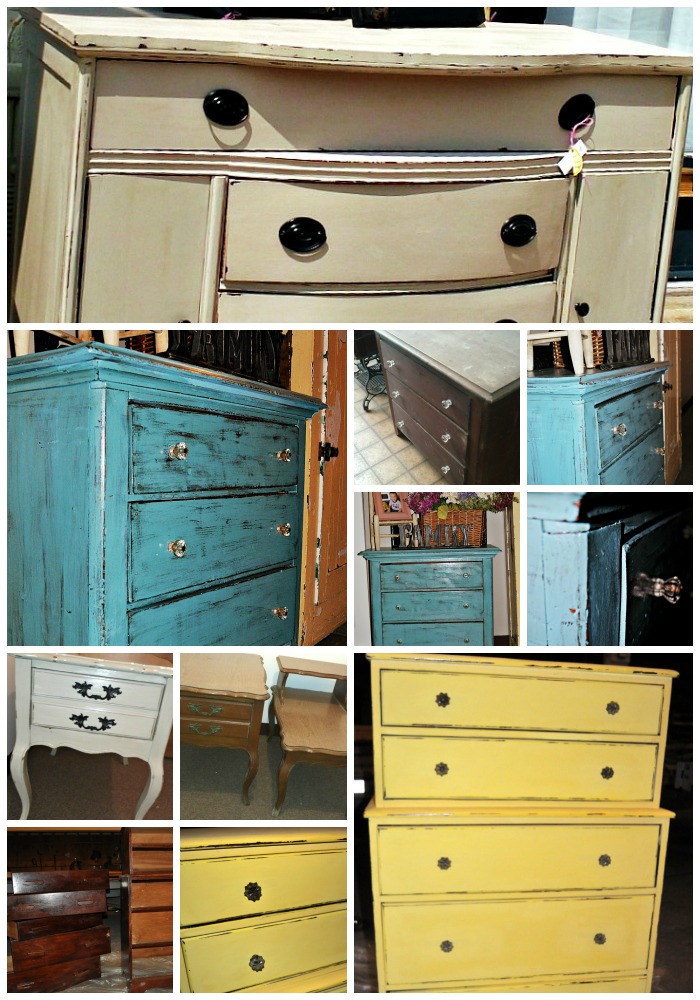
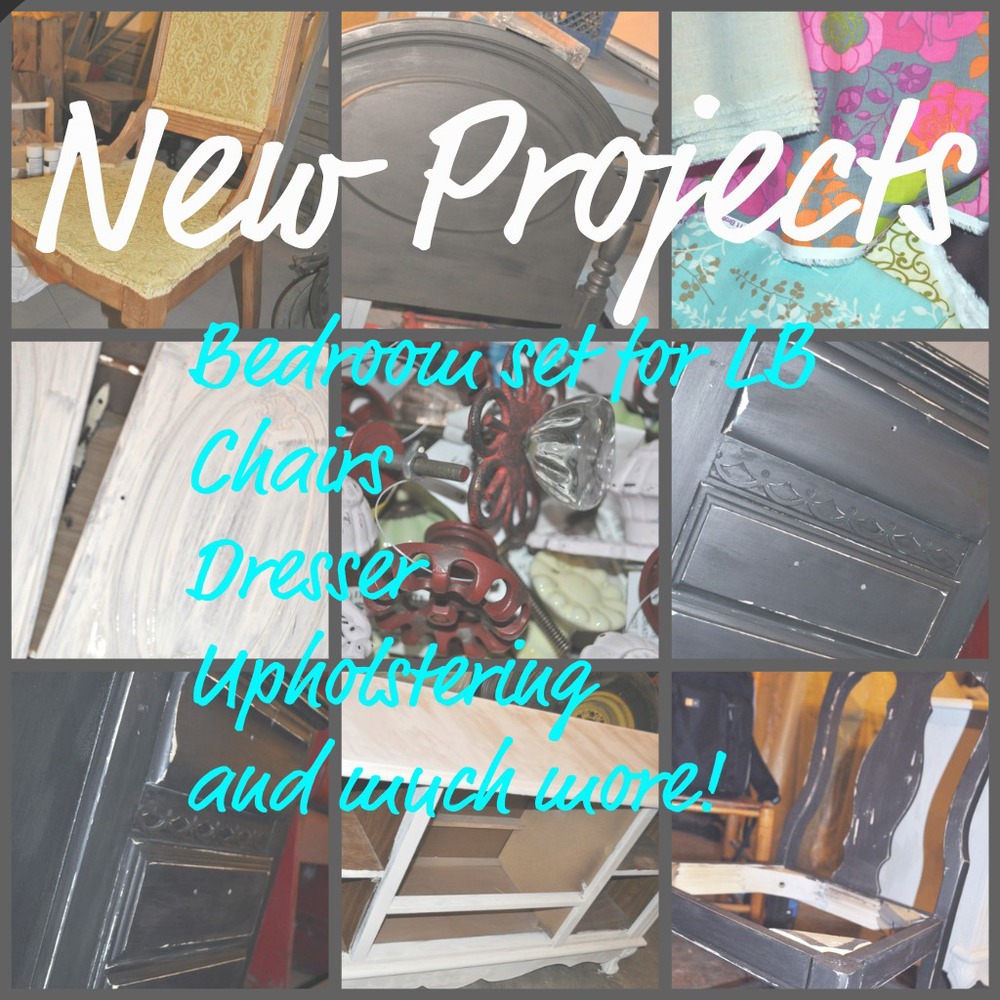
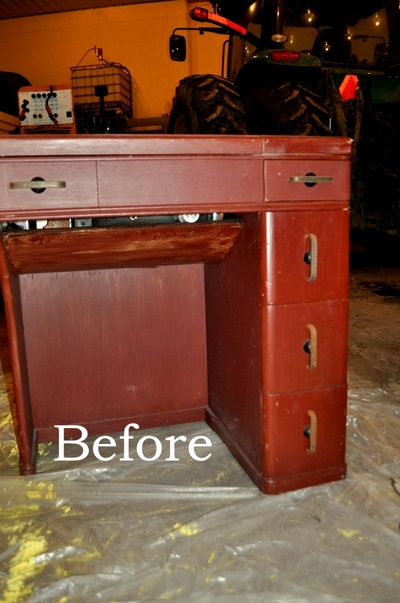
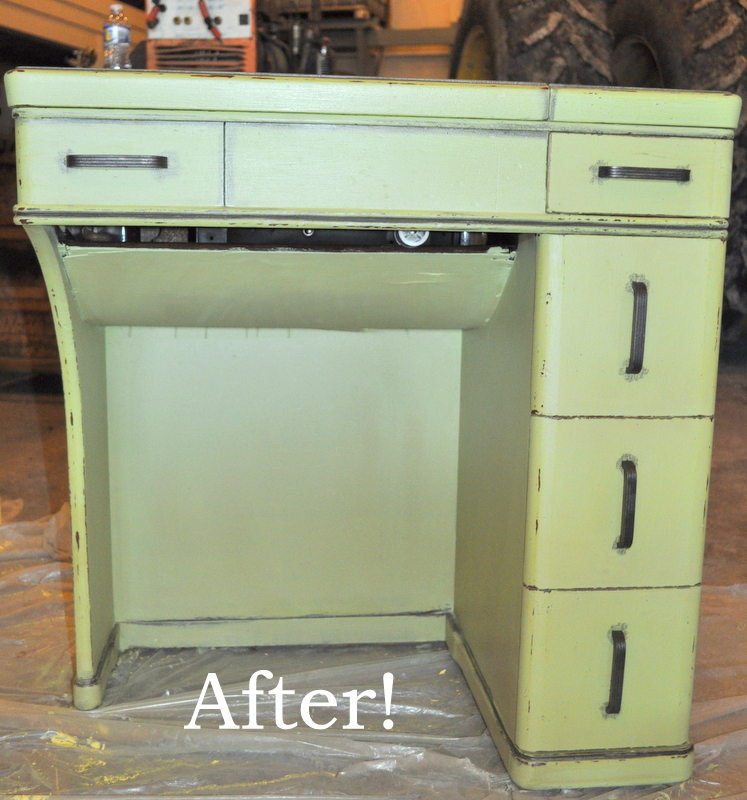
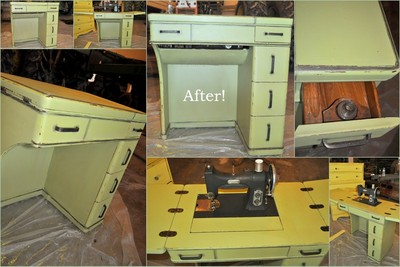
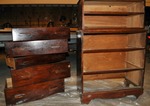
I will be selling some of my painted furniture within her store as well.  I am SO excited to be able to dedicate some time to this side of my creativity.  I have 6 pieces I am working on now for the store...  a few for sale and a few for display. 


My website.  I was ready for a face lift - so, I made a few changes to bring in the new year.  My Gallery has finally been updated!  It is great to say that I have been so busy that my gallery was not reflecting my most recent work.  And, now it does.  I still have some updating to do - but, I have started and feel proud to display all of my beautiful clients.  Same layout, but different, yet kindof the same color scheme.   And, the linen vintage fabric look is a great representation of another new avenue I am working into.... 

Vintage Rentals.  I don't know what this scope is totally yet, but I have a lot of old stuff.  And, I have an addiction to keep buying so - I thought I might as well rent it out!  I will have different pieces that can be rented for events: Parties, Baby and Bridal Showers, Weddings, etc.  A big investment I have been making is in China :) I have almost 250 complete table settings available for rent.  This will include silverware and napkins, dinner plates and salad bowls, teacups and dessert plates.  It is my newest love and addiction.  I will be working to get my own rental gallery online for viewing and rental.  The hard part is the name...  I want it to be connected to my lemon theme but still have a name for itself...  So, I will be kicking that around.  

This busy wonderful life never ceases to amaze me.  It is full of new exciting experiences, the planned and unplanned!  The best part is - I know that wherever I (we, John, Brayden, and I) end up - we are exactly where we are suppose to be.  There is always a plan that is bigger than our own, and I know there are great things in-store for us in 2013. 

Bring on the new and meaningful connections of 2013! May you all have a happy and safe New Years Eve and New Years Day.  God bless! 


Comment

3 Comments

Chalk Paint Furniture {DIY}

I have done a lot of research on chalk paint - and I am far, far from an expert - but, I am having fun learning about it! I am trying a few different techniques - and in typical Megan fashion, I have messed up a few items too! - Live and learn!  So, here is a basic tutorial on 'how to' with chalk paint!

Painting

  • I use regular latex paint - flat. I haven't tried to use anything else (satin , semi gloss - I assume it has to do with the sanding - flat works best to do that).
  • I mix 2 Cups of paint with 2 table spoons of sandless grout (make sure it is sandless - I learned this the hard way). 
  • I have used both a roller and a paint brush. It depends on the look you are trying to achieve. 
  • If you want it to look more distressed, use a paint brush to see the strokes and do 1 coat. 
  • If you want it to have more coverage - use the roller and do several coats.

Sanding

  • I use just a regular manual hand sander.
  • I do a light sanding over the entire piece.
  • I do hard sanding on the edges. 
  • I do some hard sanding on a few spots on the front to make it look more beat up. This is harder to do the more layers you have on it. 
  • Something else to try - you can do it two toned - paint 1 layer with a paint brush with 1 color and do another layer with another color using the paint brush. That looks cool too.
  • After it is dry and you are happy with the look, wipe it down to get all dust off.

Top Coat

  • Then you can use a wax or a stain on it. This is a little bit trickier. Depending on what you are doing.
  • If you want dark wood to show, use a q-tip with a dark stain and go over the edges - let it dry. it will stain the paint so be careful. If you just want it to have a shine to it, you can use a polyurethane / polycrylic - they may need to be sanded lightly and reapplied - you can follow the instructions on the can. 
  • I often use a light stain - depending on the paint color on the furniture. I use a honey color stain / natural wood - and it actually gives it a slight yellow tint... makes it look old. But, you have to be careful depending on the color. If you want something to be a light color - light pink or white - use a polyurethane - or something clear. 

Extra tips

  • Take pictures as you go! 
  • Have fun! - I love it.  I turn my music up loud and I zone out.  It feels like therapy. 
  • Don't stress - I have messed up on a few pieces - but, it is paint.  One piece that I was really loving, I applied a dark stain - to white paint...  well, it was a nightmare.  So, I sanded and stared over.  No big deal.  
  • Try your first attempt on something that you don't love.  Take an item that you aren't in love with.  It will make for a great trial run and you may just end up loving that piece of furniture again!

I also wrote about this subject here and here.

Feel free to contact me with any questions or let me know if you have a piece you would like done! 

Pictures!:

 Upcoming projects, painting fabric and making milk paint! ;)


3 Comments

Comment

pockets full of pebbles

Pockets full of pebbles, Bear hugs and worn out knees.  Cookie crumbs & kisses, my Boy is made of these.

Found this sign today on Pintrest...  it is a new must!  How perfect for my little man.  

Here are a few pictures from the last couple of days...  He makes my heart melt.


I have a lot going on this weekend.  Two photo sessions - and I am super excited!!  Can't wait to finally get outside! Beautiful day + Beautiful People = Beautiful Pictures! Win, Win, Win!!

Also, I have more projects on my plate then I even know what to do with!  I am working on my time management skills...  trying to do multiple projects at one time.  It will look something like this:

  • paint dresser
  • paint doors
  • sand headboard
  • wax footboard
  • wax chair
  • recover seat for chair #1
  • recover chair #2
  • sand dresser
  • paint doors, again
  • attach seat to chair #1
  • wax dresser
  • wax headboard
  • sand doors
  • wax doors

... or something like that :)

Hopefully I have a lot to reveal on Monday! 

I hope you all enjoy this weekend! It should be beautiful! 


Comment

Comment

I Sew Love Sue {the furniture face-lift}

Hi Everyone!

Do to the nasty weather we had here on Saturday the mini senior sessions were cancelled.  Wind blown hair can look great in a picture - but, not so much if it looks like you are standing next to a tornado. 

Instead, I made my rounds picking up my new projects.  I came across this sewing machine table and I fell in love the moment I laid eyes on her.  I saw her beauty, even after years of collecting dust, I knew that she would be beautiful again.  Meet Sue the Sewing Machine Table:

As I started to prep her for the make over, I read the label on the sewing machine.  White Rotary. Columbus, Ohio. 1927.  Wow.  1927!  I couldn't help but think about how loved she must have been when she was first made.  Her first buyer must have cherished her.  She was an electric sewing machine, a far advancement from the manual foot pedal machines.  I thought about where she has been, what she has seen, and the stories she would tell if she could.  In 85 years she went from being a once loved necessity to collecting dust and spider webs in a cold dark garage.  I am reminded of a line from one of my favorite movies Seabiscuit, 'You know, you don't throw a whole life away just 'cause he's banged up a little.' That's how I felt about Sue.  Tenderly, I polished off her hardware.  Hinges that had been painted over and handles that were rusted, now gleamed paint and rust free.  Before I picked her up I was thinking of either an antique white or a shade of green for her new look.  As soon as I saw her, I knew green was her color.  It is fresh and vibrant like new life, like the beginning of spring.  

I used the same chalk paint technique as her roommate Sally Sunshine.  I also attempted a new method, glazing.  I was unsure at first but took a chance.  I think it turned out beautiful.  The glazed edges excentuate all of her curves and detail. Without further a-do here is Sue and all of her glazed glory:


I am still looking for a permanent location for Sally and Sue.  But, very soon I am confident that they will be back where they belong, to be admired and loved in a warm home.  If you are interested in Sally or Sue please feel free to contact me!

I hope you all have a blessed week!

Comment

Comment

I heart quotes

I have always found that quotes and inspirational messages have a way of kicking me into a place I need to be, go, or get out of.  Do you know what I mean?  Some days it seems like the same old thing, same routine, the clock just ticks on.  But, these quotes / thoughts of the days / inspirational messages seem to find you when you need them most. 

Thanks to pinterest they find me every time I am pinning (which happens to be WAY TO OFTEN).  So, I thought I would share a few of my favorites – the ones that keep me thinking.  Thanks to them, those mundane days seem a little brighter.  I appreciate bigger.  Find humor in the challenges.  Show gratitude daily.  

always make new mistakes 

We must be willing to let go of the life we have planned so as to have the life that is waiting for us 

"Its impossible," said pride.  "Its risky," said experience.  "Its pointless," said reason.  "Give it a try," whispered heart. 

You don’t have to be rich to sparkle 

Your journey is unfolding exactly as it should be 

This is my Keg Stand t-shirt  - click the link to see the t-shirt, seriously... so funny!

Surround yourself with only people who are going to lift you higher

Keep the gleam in your eyes. Teach feelings. Be there.  Read books outloud with joy. REMEMBER how small they are … 

Teach him words for how he feels. Answer him when he asks “Why?”  Let him ruin his clothes. Be an example of a beautiful women with brains, determination, and integrity. Build him forts. Take him to new places. Kiss him.  BE HOME BASE. 

I carry your heart in mine 

When you are going through something hard and wonder where God is remember the teacher is always quiet during a test. 

A poor man is not the one without a cent. A poor man is the one without a dream. ~ Henry Ford

Think Happy.  Be Happy. 

Laugh Louder.  (my new desk daily quote book).

I have gone on a little online yard sale shopping spree… I am looking forward to another furniture refinishing weekend.  This will be coupled with 2 mini senior portrait sessions and a family birthday party (happy birthday Mom, Dad, Layna, and Max!).  I have LOTS of items I want to paint.  I will have to see what I can get done.  Stay tuned on Monday for a few furniture face lifts and some new Senior Smiles.  I am blessed to be so busy!! 

Have a wonderful weekend!

Comment

2 Comments

I Heart Lemon Yellow {furniture}

This weekend I tackled my first furniture makeover!  I was so excited to start this.  I have a lot of my own furniture that I is a hand-me-down, yard sale, or thrift store find.  I have been looking forward to finding the time to do this – it has been several years in the making!  I have steps,  tips and lessons learned (you can’t have a first project without learning a thing or two)!
1) First, I bought this great dresser from a thrift store for $25 (give or take a buck) – I bought a bunch of stuff that day I can’t really remember.  It was pretty sound – nothing that can’t be fixed with wood glue and some nails.  
2) I have done a lot of reading on furniture painting – so I tried to do my homework before starting (good for me – I don’t usually do that).
3) I selected my color.  I wanted something bold – but would still match my furniture.  I love blues and greens – but, I wasn’t sure where I was going to put it so I wanted something a little neutral.  I decided to stick with my lemon theme – yellow, bright vibrant Amber Magic yellow!  
4) Bought supplies.  I had to start from scratch on supplies.  So, the initial investment was a little more costly but I will be able to use these for multiple projects:
Paint - $16
Paint brush - $4
Grout - $5
Stain - $5
Hand sander - $8
Sand paper - $6
Handles - $20
5) Using the chalk paint – you aren’t supposed to have to use a primer or have to sand first (I LOVE eliminating steps)!  The recipe for the chalk paint is approximately 1 Cup of latex paint to 2 Tbls of sandless grout.  It should look like cake batter.  
6) I painted.  The first two coats didn’t cover like I wanted so I needed to do a third.  
7) I did some light sanding after.  
8) Wiped off dust.  
9) Then put the stain on with a brush and wiped it off with a rag.    
I love my lemon dresser!
Lesson learned:  I couldn’t get the handles off initially so I decided to leave them on and painted them while attached.  That caused streaks in my paint, hard to cover handles, and I didn’t like the way it looked.  While laying in bed I was being haunted by those handles.  So, I decided to give them another try to get them off.  With a little luck, a rubber mallet, and my brother for the stubborn ones the handles came off!  I had to back track a few steps.  I had to re-sand and repaint where the handles where… that’s right, three more coats…  3 more hours of waiting between coats… ugh!  I am so impatient!  Then I sanded, stained, and wiped.  I put the new handles on and the drawers back in the dresser and (almost) PERFECTION ! 
My mom was cautious of my color and technique – but after she saw the final product, I won her over!  I convinced her to let me paint a stand in the bathroom BLUE!!  I can’t wait!!  That is on this weekends to-do list! Also, I just bought an hold sewing table to conquer as well! 


2 Comments

Comment

The Sweetheart Birthdays

Check out all of the new pictures in the Photo Gallery! Almost all categories have new pictures added to them.  LOTS of cute little faces:  

Tiny SmilesMinisFamily Smiles, & Birthdays

This weekend I will be tackling and posting my first furniture makeover! Hoping to complete for under $70! Holding my breath and keeping my fingers crossed! Here is a hint:

Yellow paint + grout + $25 dollar dresser = ? TBD

Comment